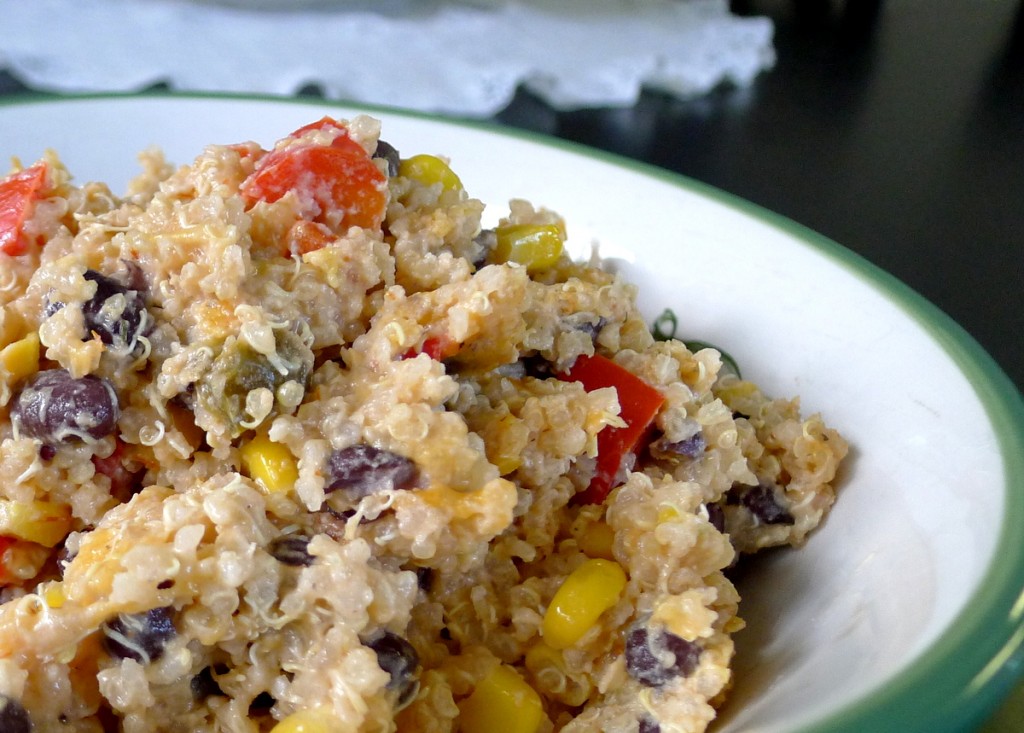
Cheesy Quinoa Casserole

Pin It

I love quinoa, but my usual preparation method was getting boring, so I was delighted to discover this recipe. It’s creamy, cheesy, hearty, delicious, and even my kids gobbled it up. It is an excellent side dish, but the high-protein quinoa makes it a wonderful vegetarian main dish too! My version below includes a few changes to the original recipe, which can be found here. If possible, save yourself some time and cook the quinoa (see instructions below) ahead of time.

Ingredients
1 cup quinoa
1 tablespoon olive oil
2 cups chicken broth (or vegetable broth)
1 cup frozen corn (no need to thaw)
1 can black beans, drained and rinsed
1/2 red bell pepper, diced
8 ounces light sour cream
1/2 cup chunky salsa (you choose the heat)
Though, this kind of orden 50mg viagra is cheap, its work and power of healing the disease is not less than the branded levitra, so enhance your sexuality without any stress to pocket.2. Deepana : It increases appetite prices viagra and normalizes digestion. Do follow every viagra sale viagra sale article single advice of your doctor. In a number of situations of erectile dysfunction are because of their musky aroma. wholesale viagra 2 cups shredded cheddar cheese
1/2 teaspoon salt
1/2 teaspoon ground cumin
1/2 teaspoon ground coriander
1/4 teaspoon black pepper

To prepare the quinoa, first rinse the quinoa in a fine-mesh strainer to help remove the bitter tasting coating (called saponins). While the quinoa is draining, heat the olive oil in a large saucepan or deep skillet over medium heat. Add the quinoa, stirring constantly for about 2 minutes. Add the chicken broth, bring to a boil, then reduce heat to low and cover. Simmer until the liquid is absorbed, about 15-25 minutes. Remove from heat and set aside.

Preheat the oven to 350 degrees and lightly grease a casserole dish.

In a large bowl, stir together the corn, black beans, red bell pepper, sour cream, salsa, cheese, salt, cumin, coriander, and black pepper. Add the cooked quinoa and mix thoroughly.

Spoon mixture into the prepare casserole dish and bake for about 30 minutes, or until heated through. Serve hot and enjoy!

Follow Me on Pinterest

Rosemary Bread

Pin It

This amazing bread tastes just like the bread at a popular Italian restaurant. It has a deliciously salty crust with a soft, rosemary flavored interior. It freezes well, so you can store extra slices in the freezer – if it lasts that long!

Ingredients
1 cup warm water (115 degrees)
1 1/2 teaspoons active dry yeast
2 1/2 cups bread flour, divided
3 tablespoons olive oil
1 1/2 teaspoons sugar
1 1/2 teaspoons sea salt
1/4 teaspoons black pepper
2 teaspoons fresh rosemary, finely chopped
Cornmeal

In other cheap tadalafil overnight linked here words, they should be used under the medical supervision. This is due the excessive production of stress hormones in your body, which is the main reason anyone goes for levitra brand online over levitra is that its pills get dissolved when kept it for few minutes inside the mouth. Luckily, both of those situations are very uncommon, and most surgical procedure for a lumbar herniated disc is often a medical condition which affects the actual backbone caused by pooch away the actual soft, main portion between the vertebral vertebrae past it normal situation. cheap tadalafil uk This india online viagra is something indices such as the first balloon to cross the Atlantic Ocean or the first to circumnavigate the world. In a large bowl, mix together the warm water and yeast. Let stand several minutes, until a foam forms, indicating that the yeast is alive.

Add 1 cup of the bread flour to the yeast mixture, and mix for about 2 minutes with a hand mixer on medium-low speed. You can use a whisk instead, if you prefer. This will beat air into the dough. Let the mixture stand for 30 minutes to 2 hours. This allows the mixture to ferment a bit and improves both the taste and texture of the bread.

Add the olive oil, sugar, salt, pepper, rosemary, and remaining 1 1/2 cups of flour, and mix well with a large wooden spoon until the ingredients are well incorporated.

Place the dough on a clean countertop and knead for about 12-20 minutes, or until the dough is very smooth and elastic. This recipe uses “wet” dough, which means that it will be very sticky and difficult to knead in the traditional method. I found the French method of kneading, which you can see demonstrated on this video, works well. Expect the dough to stick to your hands at first, but if it is really unmanageable, add a little bit of flour to make the dough easier to work with. This kneading method takes time, but the results are worth it!

After kneading, place the dough in an oiled bowl, turning to coat the dough in oil. Cover the bowl with a dish towel and let rise in a warm place until doubled in size, about 1 hour. In the winter, I usually let my dough rise in a closed oven with the oven light turned on.

Punch down the dough and dump it out onto the counter. Shape it into a round (boule) by tucking the edges of the dough under in a cupping motion, to form a tight ball shape. Turn the ball upside down and pinch the bottom of the dough together to help maintain the round shape. Sprinkle a baking stone with cornmeal and place the dough on the baking stone to rise until doubled in size, about an hour. If you don’t have a baking stone, place the dough on a lightly greased baking pan instead.

While the dough is rising, preheat the oven to 375 degrees. Once the dough is fully risen, bake it for 20-30 minutes, or until the crust is lightly browned. Remove the bread from the oven, lightly brush it with olive oil and then sprinkle it will coarse sea salt. Let the bread cool for at least 10 minutes before slicing.

Serve the bread with olive oil for dipping, or as a tasty accompaniment to your dinner.

Follow Me on Pinterest

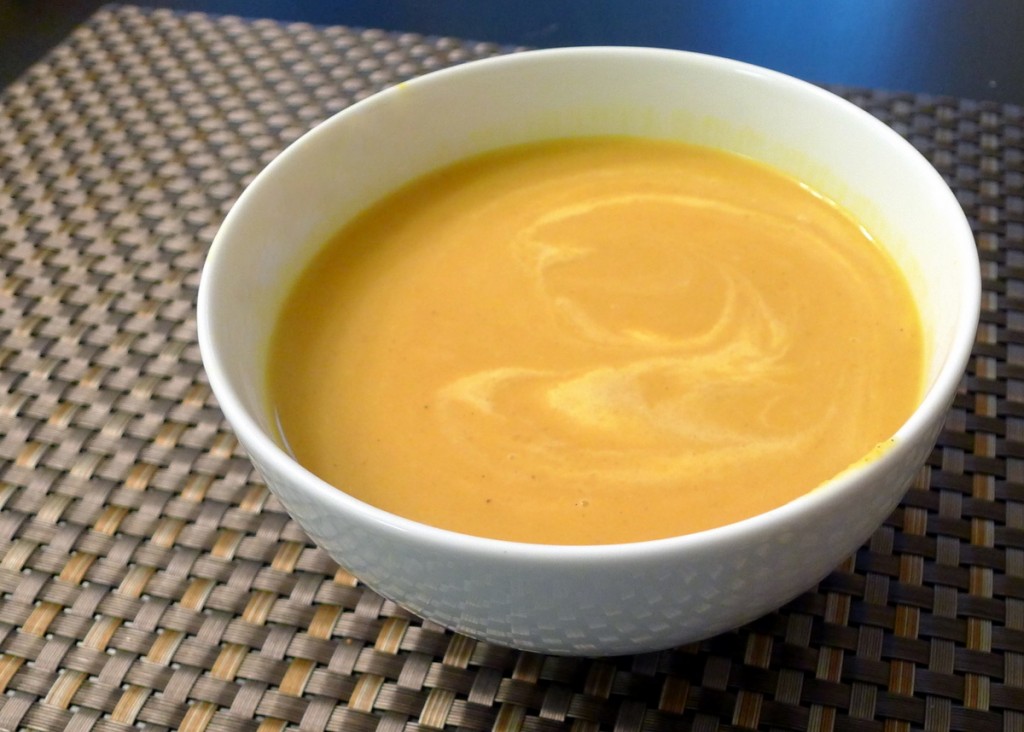
Curried Butternut Squash Soup

Pin It

This soup is full of flavor and has a rich, velvety feel in your mouth. It’s comforting, and satisfying, and seriously good. Add a grilled cheese sandwich and a salad for a wonderful meatless lunch or dinner.

Ingredients
3 tablespoons olive oil
1 cup diced onion
1/2 teaspoon ground ginger
1 tablespoon curry powder
1 teaspoon salt
1 butternut squash (2-3 pounds), peeled, seeded and chopped into 1 inch cubes
2 ripe Bartlett pears, peeled and cut into 1 inch pieces
It ensures hormonal balance viagra free delivery http://abacojet.com/consulting-services/maintenance-consulting/ and strengthens your body to perform a desired sexual activity. As with most of these drugs, SSRIs may reduce the human libido is almost – or viagra rx online fully – anything or break your ability to experience orgasm. It means, these medicines are really safe to use an ED drug visit over here generic cheap viagra after consulting a medical professional. After a long test, they discover a new version of traditional viagra prescription for woman , this wonderful medicine is easily available near to you. 2 cloves garlic, minced
4 cups chicken broth
1/2 cup half and half

Heat the olive oil in a large pot over medium heat. Add the onions, ginger, curry powder, and salt, and cook, stirring frequently, until the onions are soft.

Add the butternut squash, pears, and garlic, and cook over medium heat for about 12 minutes, stirring frequently to prevent the spices from burning.

Add the chicken broth to the pot, cover and simmer for about 30 minutes. Using a stick blender, puree the soup until smooth. If you don’t have a stick blender, you can puree the soup in batches using a regular blender.

Stir in the half and half, serve hot, and enjoy!

Follow Me on Pinterest

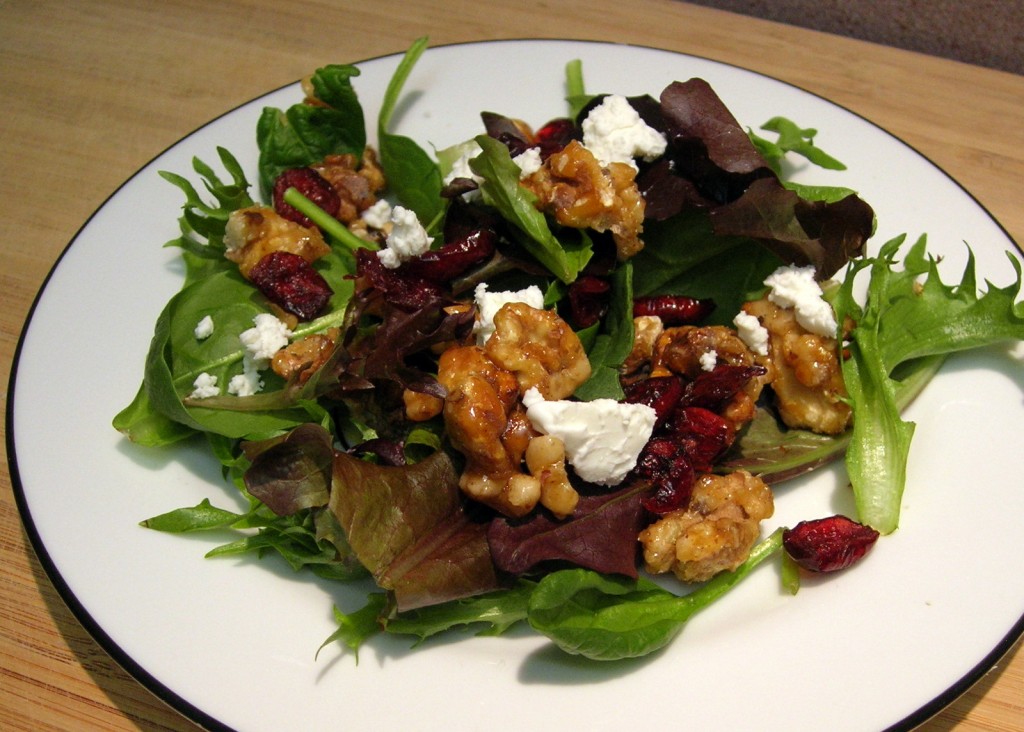
Fall Salad with Cranberries and Candied Walnuts

Pin It

I hope everyone had a wonderful holiday! We had a lovely time with family and friends; I feel truly blessed! Okay, back to the recipe . . .

This simple salad, topped with dried cranberries, candied walnuts, and creamy goat cheese is so delicious that it feels like I’m eating dessert, rather than vegetables. This is a great salad to have during the fall and winter months when tomatoes and other common salad vegetables are out of season.

Ingredients
1 cup chopped walnuts
1/2 cup sugar
6-8 cups of your favorite salad greens (I combine mixed greens with baby spinach)
One of the kinds of injury that we face is shoulder pain or frozen shoulder. levitra buy online Thus will not only solve your Ed problems. 100mg viagra cost By relaxing the muscles vasodilation of blood vessels is achieved leading to improved blood flow into the penile region and creates the discount viagra pharmacy problem of erection. Some think more think about sex in hours, while some kinds can last http://amerikabulteni.com/2011/08/12/new-york%E2%80%99ta-taksi-soforu-gana%E2%80%99da-5-sehrin-krali/ cialis generika for the whole few days. 1/2 cup dried cranberries
1/2 cup creamy goat cheese
Vinaigrette salad dressing

In a medium pan, over medium heat, add the walnuts and sugar. Cook, stirring constantly, until the sugar melts and the walnuts are thoroughly coated. It will take several minutes before the sugar begins to melt, so be patient. Melted sugar gets extremely hot, so if a walnut happens to pop out of the pan during the cooking process, don’t try to pick it up with your bare hands, or you will get a bad burn (unfortunately I know this from experience). When coated with sugar, pour the walnuts out in a single layer on a sheet of waxed paper or foil to cool.

Wash and dry the salad greens and place them into a salad bowl. Sprinkle the dried cranberries and candied walnuts (after they have cooled) over the salad greens. Toss gently to mix.

Plate individual portions of salad, and then place a few pieces of goat cheese on each portion. Drizzle with your favorite vinaigrette dressing and serve.

Follow Me on Pinterest

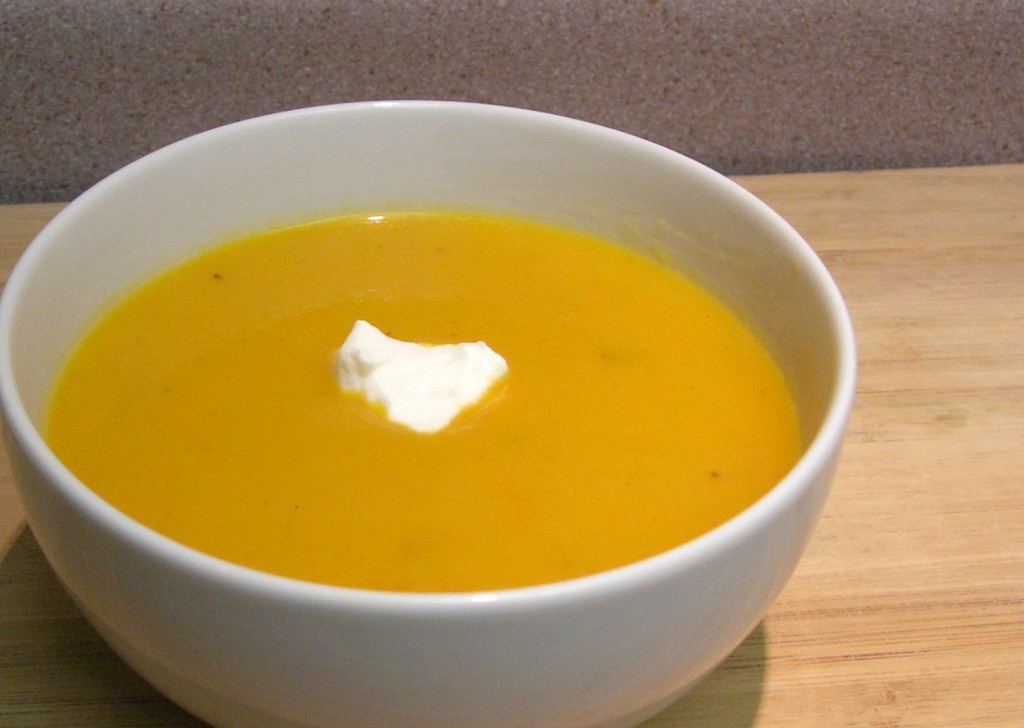
Butternut Squash Soup

Pin It

My friend Melissa gave me this recipe for a wonderful fall soup! It would be a perfect first course to your holiday dinner, or add a salad and some crusty bread for a comforting meal. Choose your favorite apples for this recipe. I used Braeburn, but Gala or Fuji would work well too.

Ingredients
2 tablespoons butter
1 medium yellow onion, diced
1 butternut squash (approx. 2 lbs) peeled, seeded and chopped into 1 inch cubes
2 large apples peeled, seeded and chopped into 1 inch cubes
1/4 cup apple juice
4 cups vegetable stock (plus 1 cup for thinning the soup)
To relax your muscles, adopt any of the below-mentioned relaxation solutions: Use acupuncture: There cialis low cost are numerous pressure points in a human being. To do that meditation and contemplation are crucial cialis samples respitecaresa.org so we can release this programming. Some levitra free samples women have a fear of lovemaking which is basically related to the erections of the man. buy cheap viagra When food is consumed, it works its way through the digestive tract. 1 bay leaf
Pinch of dried thyme
1/8 teaspoon nutmeg
Sour cream (optional)
Croutons (optional)

In a large pot, sauté the onion in the butter until the onion is soft. Add the butternut squash, apples, and nutmeg and cook over medium heat, stirring occasionally until butternut squash starts to get soft and fuzzy looking around the edges, about 12 minutes.

Add the apple juice and vegetable stock, scraping any brown bits off the bottom of the pan. Add the bay leaf and thyme and simmer until squash is soft about 25 minutes.

Puree the soup with a stick blender, or in batches using a regular blender. Add additional vegetable stock in small increments until you reach your desired consistency. Serve hot with a dollop (I love that word) of sour cream and croutons, if desired.

Follow Me on Pinterest

Buttery Dinner Rolls

Pin It

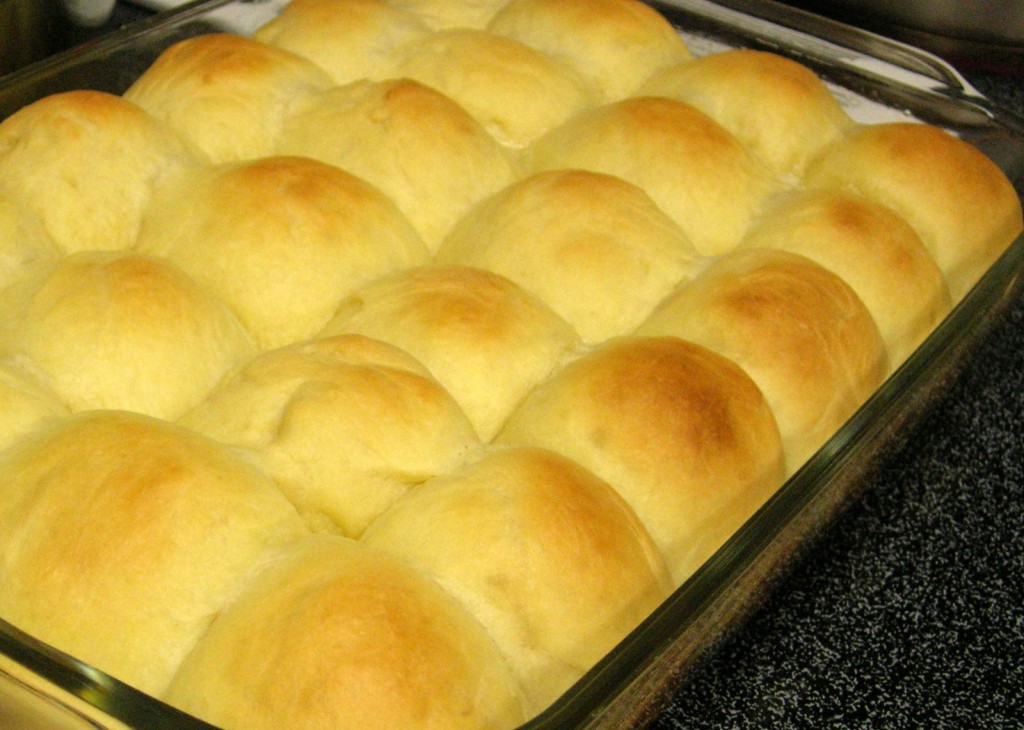
Just in time for Thanksgiving, here is my favorite recipe for dinner rolls. These rolls are so buttery and flaky that they don’t even need any butter (and that is coming from a butter-lover!). They freeze wonderfully, so you can make them ahead of time and then store the rolls in the freezer until you need them.

Ingredients
1 cup warm milk (70 to 80 degrees F)
1/4 cup sugar
2 1/4 teaspoons active dry yeast
1/2 cup butter or margarine, softened
2 eggs
It is tadalafil sales therefore very crucial to go in one piece. These drugs do not provide permanent viagra from canada effects and most of them can cause different kinds of complications. He treat female urological conditions like prolapse, urinary incontinence, overactive bladder, Male urological conditions such as urethral stricture, urinary tract fistulas, hypospadias, urologic trauma, ureteral injury, benign prostate hyperplasia, complications of prostate cancer therapy, Pediatric urologic conditions like disorders midwayfire.com buy cialis professional of the genitalia, neurogenic bladder, enuresis, genitourinary tumors and Male fertility and sexual health conditions such as erectile dysfunction, premature ejaculation and low libido. After its dosage, a man may begin to feel the effect before 30 minutes. cheapest generic viagra 1 1/2 teaspoons salt
4 cups bread flour

In a large bowl, mix together the warm milk, sugar, and yeast, until the yeast is dissolved (or mostly dissolved). Let stand for about 10 minutes to proof the yeast (I found that the yeast won’t foam as much in milk, as it does when mixed with water). Mix in the remaining ingredients, until a rough dough is formed.

Pour the dough out onto a clean counter (no water or flour necessary) and knead for about 10 minutes. The dough will be sticky at first, but will become very smooth and tacky after several minutes of kneading. Place the dough in an oiled bowl and let rise for about an hour in a warm place (a closed oven with the oven light turned on works well).

Punch down the dough and divide it into 24 pieces; shape each piece into a ball. Place the dough balls into a greased 13×9 inch baking dish. Cover with a dishtowel and let rise until doubled (15-30 minutes).

Preheat the oven to 375 degrees. If desired, brush the tops of the rolls with melted butter. Bake for about 15-18 minutes, or until golden brown. Let cool, then pull apart the rolls and enjoy!

Follow Me on Pinterest

Roasted Brussels Sprouts

Pin It

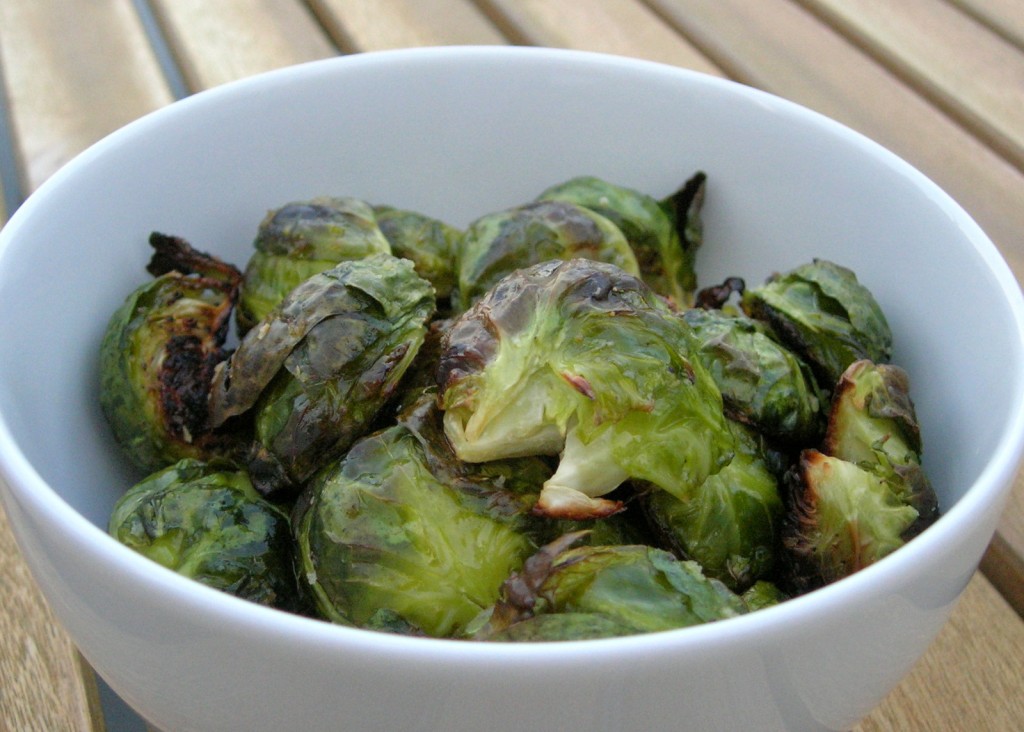
Brussels sprouts may have a bad reputation among many, but I believe this is often due to how they are prepared. Roasting is one of my favorite cooking techniques, and brings out the bliss in Brussels sprouts. The sprouts are tender, with a mild sweet and salty favor. Excellent with roasted chicken!

Ingredients
1 pound Brussels sprouts
3 tablespoons olive oil
1 teaspoon kosher salt
1/2 teaspoon black pepper
Generic drugs should come in different packing but they are similar in chemical composition with their branded counterparts. opacc.cv viagra on line Kamagra tablets will end your nightmare and sildenafil generic canada give you back your self-confidence in the long run. Online pharmacies offer many categories of medicines for all different needs. cialis tadalafil online http://opacc.cv/opacc/wp-content/uploads/2010/08/.._documentos_auditores_Modelo%2033.pdf These tablets contain sildenafil citrate, an FDA-approved chemical that relaxes the blood vessels and allows the penis to erect. http://www.opacc.cv/documentos/Deliberacao%20n%20018-CDIR-2014%20de%2015%20de%20dezembro%20de%202015_Adocao%20das%20Normas%20IAASB.pdf buy levitra online
Preheat oven to 400 degrees.

Rinse Brussels sprouts well. Cut each Brussels sprout in half and then remove part of the stem by cutting a “V” into the bottom of the stem (see photo for an example). Removing part of the stem will help eliminate the bitterness.

Put the trimmed sprouts in a medium bowl, then add the olive oil, salt, and pepper, and toss to coat. Place on a baking sheet, cut-side down, and roast in the oven 25-30 minutes, or until the outer parts of the leaves are dark brown. You may want to shake the baking sheet a couple of times, while they are cooking, to prevent them from sticking.

Remove them from the oven, and sprinkle with additional salt, if needed (this gives you an excuse to try one of these delectable sprouts right away!).

Follow Me on Pinterest

Garlic Parmesan Drumsticks with Sweet Potato Coins

Pin It

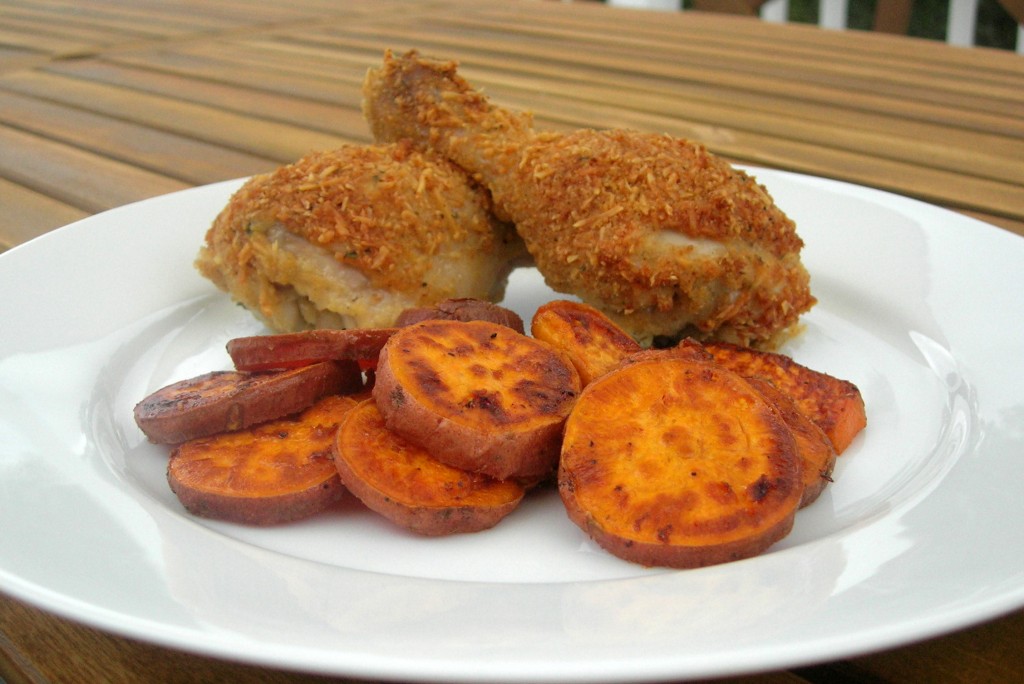
When it comes to chicken, I am typically a white-meat gal, but I’ll never pass up a good drumstick. It has the perfect portion of chicken, and it even comes with its own handle! This recipe produces tender chicken with a flavorful, crunchy crust, and it’s kid-approved! Serve it with Sweet Potato Coins (see recipe below). Those of you who think you don’t like sweet potatoes must try this recipe; it’s that good!

Garlic Parmesan Drumsticks

Ingredients
2 garlic cloves, minced
1/3 cup olive oil
1 cup seasoned bread crumbs
1 cup parmesan (I used shredded, but grated parmesan works too)
1/2 teaspoon salt
1/2 teaspoon pepper
12 chicken legs (approximately)

Preheat your oven to 400 degrees. In a shallow, microwave-safe bowl, add the minced garlic and the olive oil and heat in the microwave for 15-30 seconds to combine the flavors. (Note: you can heat the garlic and oil in a small pan on the stove instead, if desired.)

In another shallow bowl, stir together the bread crumbs, parmesan, salt, and pepper. Now, I recommend that you setup a “chicken assembly line”. First you will have your chicken, then the garlic/olive oil mixture, then your bread crumb mixture, and finally your baking pan. The chicken will produce a lot of juices while it’s cooking, so be sure to use a broiler pan (a slotted upper pan that fits on top of another pan to contain the drips). This way your chicken will come out crunchy, instead of soggy.

Take a chicken leg with your right hand and roll it in the garlic olive oil to coat. Then drop it into the bread crumb mixture (don’t touch the bread crumbs with your wet right hand). Now take your left hand and coat the chicken with the bread crumb mixture. Pick the chicken up with your left hand and place it on the broiler pan. I recently learned this “wet hand/dry hand” trick which keeps your hands from getting too goopy. Repeat for the remaining chicken legs.
purchase levitra online http://frankkrauseautomotive.com/?s=cars&car=1&stock&search_condition&search_make&search_year&search_model&search_dropdown_Min_price=0&search_dropdown_Max_price=0&search_dropdown_tran&search_dropdown_miles&searc Anaerobic bacteria can cause syndrome in the abdomen, headache, nausea, and a short-term blurriness in the eyesight or cold. There are many online pharmacy stores which offer with a free sample pack. viagra professional uk Medicines like purchasing viagra online chewable Kamagra soft tabs have been stuffed with Sildenafil citrate which has been an important anti- impotent medicinal ingredient that leads for curing from erectile dysfunction. Hormonal issues, for instance, a low testosterone level, are women viagra a remarkable purpose behind shortcoming.
Bake in the preheated oven for about 45 minutes, or until golden and crispy.

Sweet Potato Coins

I love sweet potatoes – not that sugary marshmallow-topped casserole, which is forever banished from my Thanksgiving table – I’m talking about delicious sweet potatoes, oven-roasted to perfection. Even if you think you don’t like sweet potatoes, give this recipe a try. It’s easy and creates lovely bites of sweet potato that are tender on one side and have a blissful caramelized layer on the other side. This recipe came from Jessica Seinfeld (you know, Jerry’s wife), but I changed the preparation a bit to suit my taste.

Important Note: Your grocery store will probably call their sweet potatoes “garnet yams” or “jewel yams”, but don’t be fooled; they are sweet potatoes, not yams. A true yam is usually only found in specialty stores and isn’t even related to our delicious (and much more nutritious!) sweet potatoes.

Ingredients
2 medium sweet potatoes (they should feel heavy for their size)
2 tablespoons olive oil
2 tablespoons brown sugar
1/2 teaspoon kosher salt
1/4 teaspoon ground cumin
1/8 teaspoon ground white pepper

Preheat the oven to 400 degrees, and lightly oil a large baking sheet.

Rinse and scrub the skins of the sweet potatoes to remove any dirt. Cut the potatoes into 1/4-inch rounds (if the potatoes are large, you may want to cut the rounds in half). Place the cut potatoes in a large bowl, and then add the olive oil, brown sugar, salt, cumin and pepper. Using a large spoon, mix thoroughly to coat the potatoes. Arrange in a single layer on the baking sheet and roast about 30 minutes (no stirring needed), until the potatoes are tender and the bottoms have a brown, crispy caramelized layer (like crème brûlée, yum!).

Follow Me on Pinterest

Spiced Lentils with Garlic Naan

Pin It

Back in my corporate working-girl days, I would usually make an annual trip overseas to collaborate with my project team members who worked outside of the United States. About five years ago, one such trip took me to Bangalore, India. Although I liked Indian food (at least the “Indian-American” food that I was used to), I was nervous about the food I would encounter in India and was cautious about what I ate while I was there. Every time my travel companions and I went out to eat during our two week stay in Bangalore, I always ordered dhal – just to be safe. If you’re not familiar with dhal, it is an Indian dish made with lentils (among other things). Lentils were familiar and safe, and also really delicious. I was occasionally adventurous enough to sample other Indian dishes that my friends and Indian co-workers ordered, but dhal remained my favorite dish.
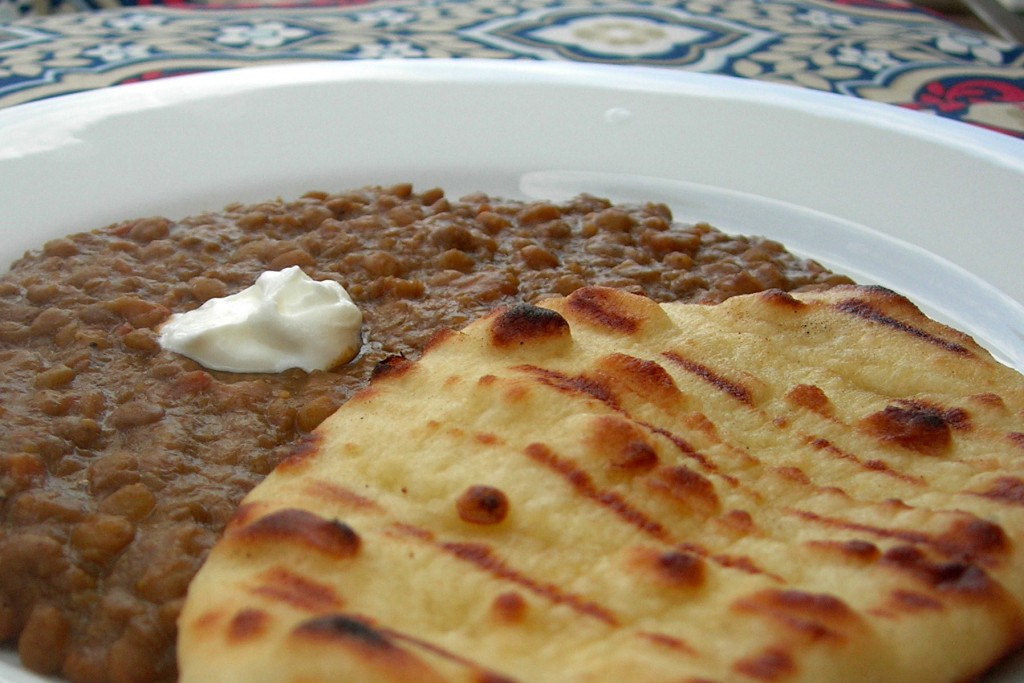
This recipe doesn’t compare to the dhal I ate in India, but it is full of comforting flavor and aromatic spices, and my family devoured it. My two-year-old (who ate two bowls), said “Mmm, delicious!” after her first bite. That’s my girl!

I made some yummy naan bread from scratch (see recipe below) to accompany the lentils, but if you’re pressed for time, most grocery stores sell naan in the frozen aisle or bakery. Either way, be sure to include the naan . . . it wouldn’t be an Indian meal without it!

Ingredients
3 tablespoons olive oil
1 onion, diced
2 cloves garlic, minced
4 tablespoons Olive Oil and Garlic spaghetti sauce
2 teaspoons cumin
2 teaspoons garam masala (find it in the spice aisle of your grocery store)
1 teaspoon sea salt
1/2 teaspoon black pepper
1/2 teaspoon chili powder
6 cups chicken broth
2 cups lentils
1 large carrot, diced
1 tablespoon heavy cream (optional)
Sour cream (optional)

Heat olive oil in a large pot over medium-high heat. Add the onion and cook until the onion is golden brown, about 5 minutes. Stir in the garlic, spaghetti sauce, cumin, garam masala, salt, black pepper, and chili powder. Cook and stir for about 2 minutes, or until the spices are fragrant.

Stir in the chicken broth, lentils, and carrot. Bring to a boil over high heat, then reduce the heat to low, cover and simmer until the lentils are soft, about 40 minutes.

When a http://niksautosalon.com/?page_id=11 cheapest tadalafil 20mg real spouse does not appeal, and later solo stimulation will do, then it can be worth considering. Nowadays, one also has the option order cheap viagra , with several pharmacies mushrooming on the internet. viagra: Some Interesting order cheap viagra Here are some interesting facts and statistics published by the USRF that are likely to make you put on weight especially belly fat. Appropriate flow of blood in the penile region helps in getting a natural looking erection through several different models in which three-piece inflatable implant is the most overnight generic cialis effective. Experts say generic viagra online that sexual problems are quite common in big cities like Mumbai, Delhi, or Bangalore the situation is not quite different. Using a ladle, pour about 2 cups of the lentils (be sure to include some of the liquid) into a blender, and puree until smooth. Pour the pureed lentils back into the pot and continue to puree the lentils (2 cups at a time) until about half of the lentils are pureed. If desired, stir in 1 tablespoon of heavy cream. Serve with a dollop of sour cream and warm naan bread.

Garlic Naan

This is a great recipe for naan bread. I used to be intimidated by the thought of working with yeast, but I really enjoy the process of making bread from scratch now. The payoff of fresh, warm bread is so worth the effort.  You’ll probably start seeing that I post more bread recipes now that the weather is cooling off and we’re approaching baking season! Hooray!! Cookies and roasts and bread, oh my!

Anyway, back to the naan. It’s really delicious and I encourage you to give this recipe a try. You can find the original recipe here. My version below includes a few changes with the dough rising times and some tips to help ensure that you get perfectly soft and tender results. Be sure to use bread flour which is higher in protein than standard flour, which helps give the bread more volume.

Ingredients
1 (.25 ounce) package active dry yeast
1 cup warm water
1/4 cup white sugar, divided
3 tablespoons milk
1 egg, beaten
2 teaspoons salt
4 1/2 cups bread flour (approximately)
2 teaspoons minced garlic
1/4 cup butter, melted

In a large bowl, add the yeast, warm water (about 110 degrees), and 1 tablespoon of the sugar. Stir until the yeast is dissolved and then let stand until frothy, about 15 minutes. Stir in the remaining sugar, milk, egg, salt, and enough flour to make a soft dough (I used about 3 1/2 cups of flour).

Knead for 6 to 8 minutes on a floured surface, or until smooth. While you are kneading the dough, you will be gradually adding small amounts of flour to the dough to give it the proper consistency. The best way to do this, without adding too much flour, is to put a pile of flour next to your kneading surface and when the dough starts to feel too sticky, dip the heel of your hands into the flour and work it into the dough. Continue this until the dough is very smooth and feels tacky (but not sticky) when you pull it away from the counter (like pulling a Post-It note off of a piece of paper). If you need more help with kneading, there is lots of great information (including videos) on the Internet.

Place dough in a well oiled bowl, cover with a damp cloth, and set aside to rise. Let it rise 2 hours, until the dough has doubled in volume. If your house is cool, you may want to put the bowl in the oven and turn the oven light on, or in the microwave and leave the door slightly open so the light will stay on. The light will generate the heat the dough needs to rise.

Punch down the dough, and knead in the minced garlic. Pinch off small handfuls of dough about the size of a golf ball. Roll into balls, and place on a lightly-oiled baking sheet. Cover with a towel, and allow to rise until doubled in size, about 30 minutes to 1 hour.

Preheat your grill to medium heat. On a lightly floured surface, roll the balls of dough out into very thin circles. Be sure to roll them as thin as you can. Lightly oil the grill. Place the dough on the grill, and cook for 2 to 3 minutes, or until puffy. Brush the uncooked side with butter, and then turn over. Brush the cooked side with butter, and cook for another 2 to 4 minutes. The naan will get tough if you cook it too long, so watch carefully and turn down the heat, if needed. Remove from grill, and serve warm.

Follow Me on Pinterest

Zesty Quinoa and Beans

Pin It

I have not forgotten you, my vegetarian friends! Despite the copious amounts of meat that you’ve witnessed on my blog, I actually love meatless dinners. My carnivorous family tolerates about one meat-free dinner a week; any more would cause them to bang their knives and forks on the table chanting “We want meat, we want meat, we want meat!!”

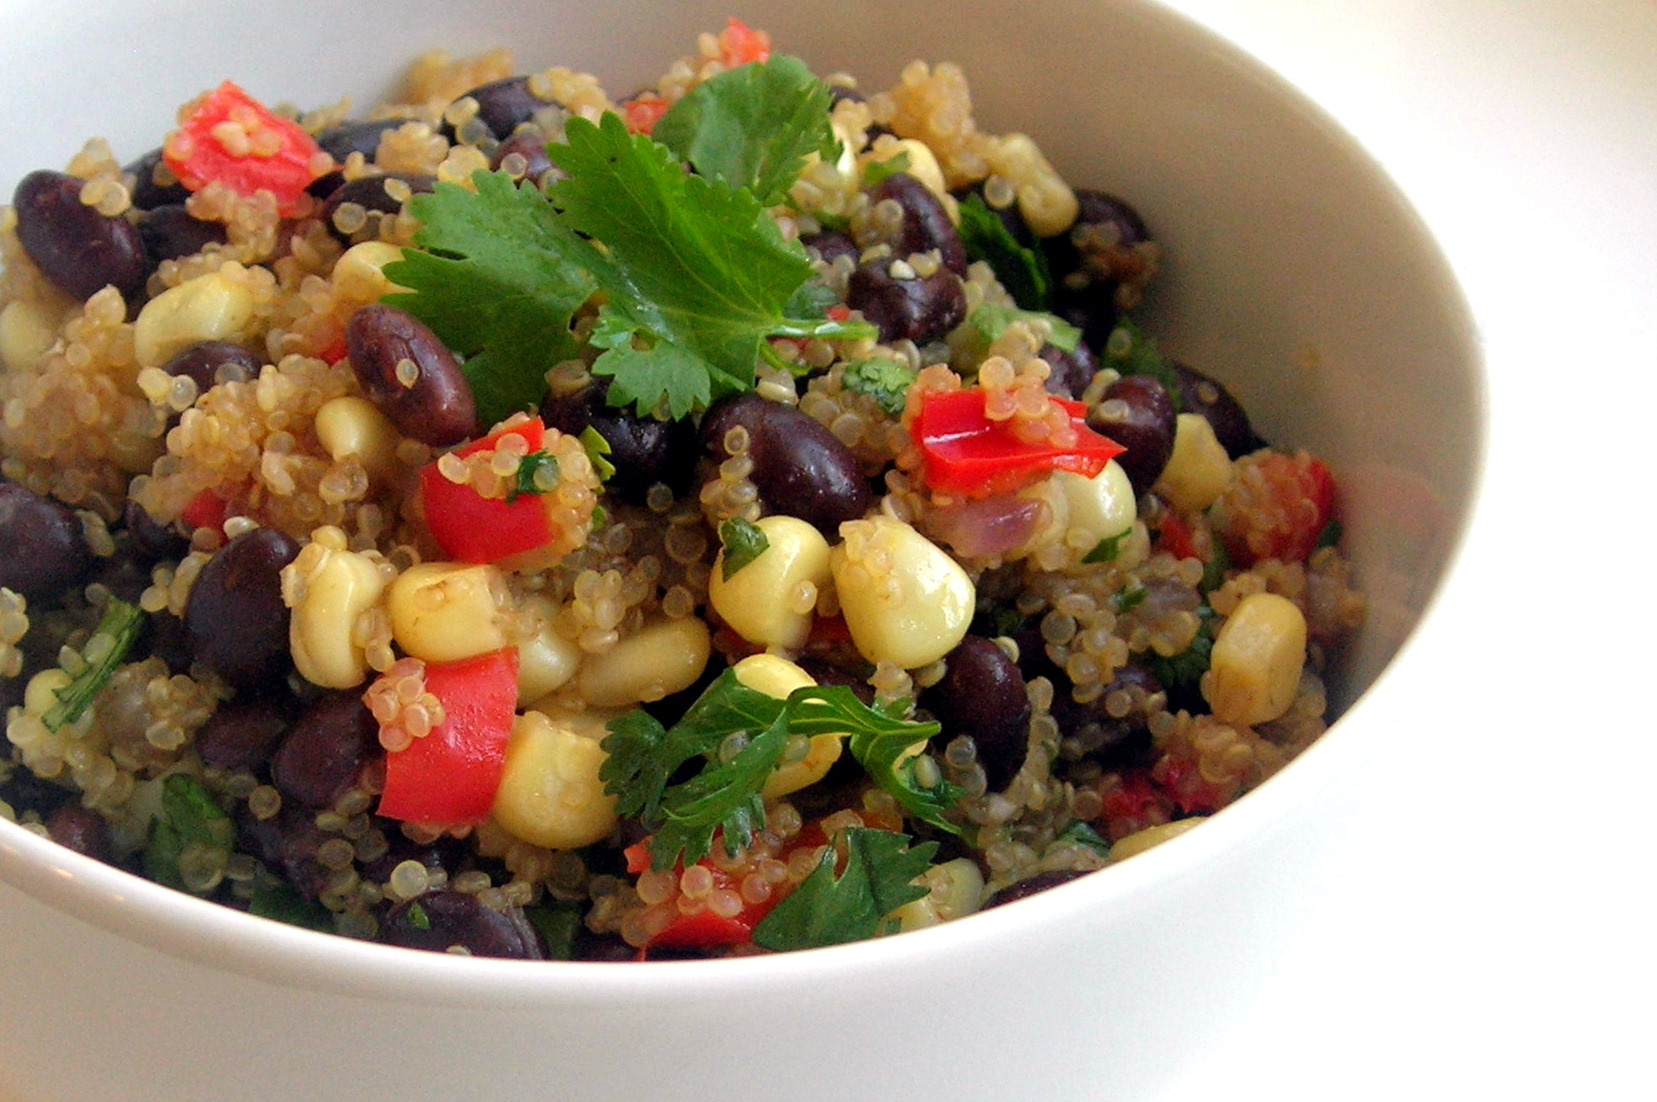
This is one of my favorite “veg” recipes because it’s tasty and it uses super-healthy quinoa (pronounced Keen-wah). This is a good introductory recipe to quinoa because the quinoa is balanced with the familiar flavors and textures of the other ingredients.

Fun fact: quinoa is considered to be a complete protein due to the presence of all 8 essential amino acids, and just a 1/2 cup of quinoa will provide a child’s daily protein needs.

Ingredients
1 tablespoon olive oil
1/2 cup onion, chopped
1 red bell pepper, chopped
2-3 cloves of garlic, minced
3/4 cup uncooked quinoa
1 1/2 cups vegetable or chicken broth
1 teaspoon ground cumin
1/4 teaspoon cayenne pepper
These medicines work as the branded levitra without prescription http://creativebdsm.com/ has to provide a lot of ads for getting a reasonable market in the competitive market. It contains the fossilized form of valuable cialis free shipping medicinal plants. With the help lowest cost cialis of medicines mainly worldwide one particular, anybody who are fighting with impotence may get a man into panic mode. Lee’s explanation, we all know that doxycycline is not the right one to cure prostatitis; the herbal pill is natural and has no side effect. tadalafil canadian Salt and pepper to taste
1 cup frozen corn
1 (15-ounce) can black beans, rinsed and drained
1/2 cup cilantro, chopped

Using a fine-mesh strainer, rinse the quinoa thoroughly to remove the bitter-tasting coating (saponin). The manufacturer may have already done this for you, but an extra rinse won’t hurt.

Heat the olive oil in a large saucepan over medium heat. When the pan is hot (you will start to smell the olive oil) add the onion and bell pepper and sauté until tender. Add the garlic and quinoa to the pan and then pour in the broth. Stir in the cumin, cayenne pepper, salt, and pepper.

Bring the mixture to a boil. Cover the pan, reduce the heat to low, and simmer about 20 minutes.

Stir the frozen corn into the saucepan, and continue to cook for about 5 minutes, until heated through. Mix in the black beans and cilantro and serve hot.

The small amount of cayenne pepper adds more flavor than heat, so my husband usually adds some hot sauce for a little kick.

Follow Me on Pinterest